8. Talking stars
8.1 Installation
To set up the project, follow these installation steps:
git clone https://github.com/randreu28/TFG.talking-stars
cd TFG.talking-stars
yarn install
yarn dev
8.2 Overview
In case you are not familiar with shaders, it is recommended that you’ve read the Particle showcase project, as it gives the base understanding of them.
This project was similar to the buckle up project, as both’s objectives aimed to play around with shaders with the help of the community of shadertoy. This shader is special from the rest, as it relies on the user’s microphone for its rendering process.
This project wouldn’t be possible without the help of CBS, the author of the Simplicity Galaxy shader.
8.3 Media Stream
For the use of the user’s microphone, the user must give permission access to the microphone. This comes in the form of a Media Stream and is accessible through the navigator API:
navigator.mediaDevices
  .getUserMedia({ audio: true })
  .then((stream) => {
    setStream(stream);
  })
  .catch(() => {
    //...
  });
Once the user has granted access to the microphone, we save it in state. This way, we make sure the <Shader/> component will always have the stream prop:
export default function App() {
const [stream, setStream] = useState<null | MediaStream>(null);
if (stream) {
return (
<>
<Signature />
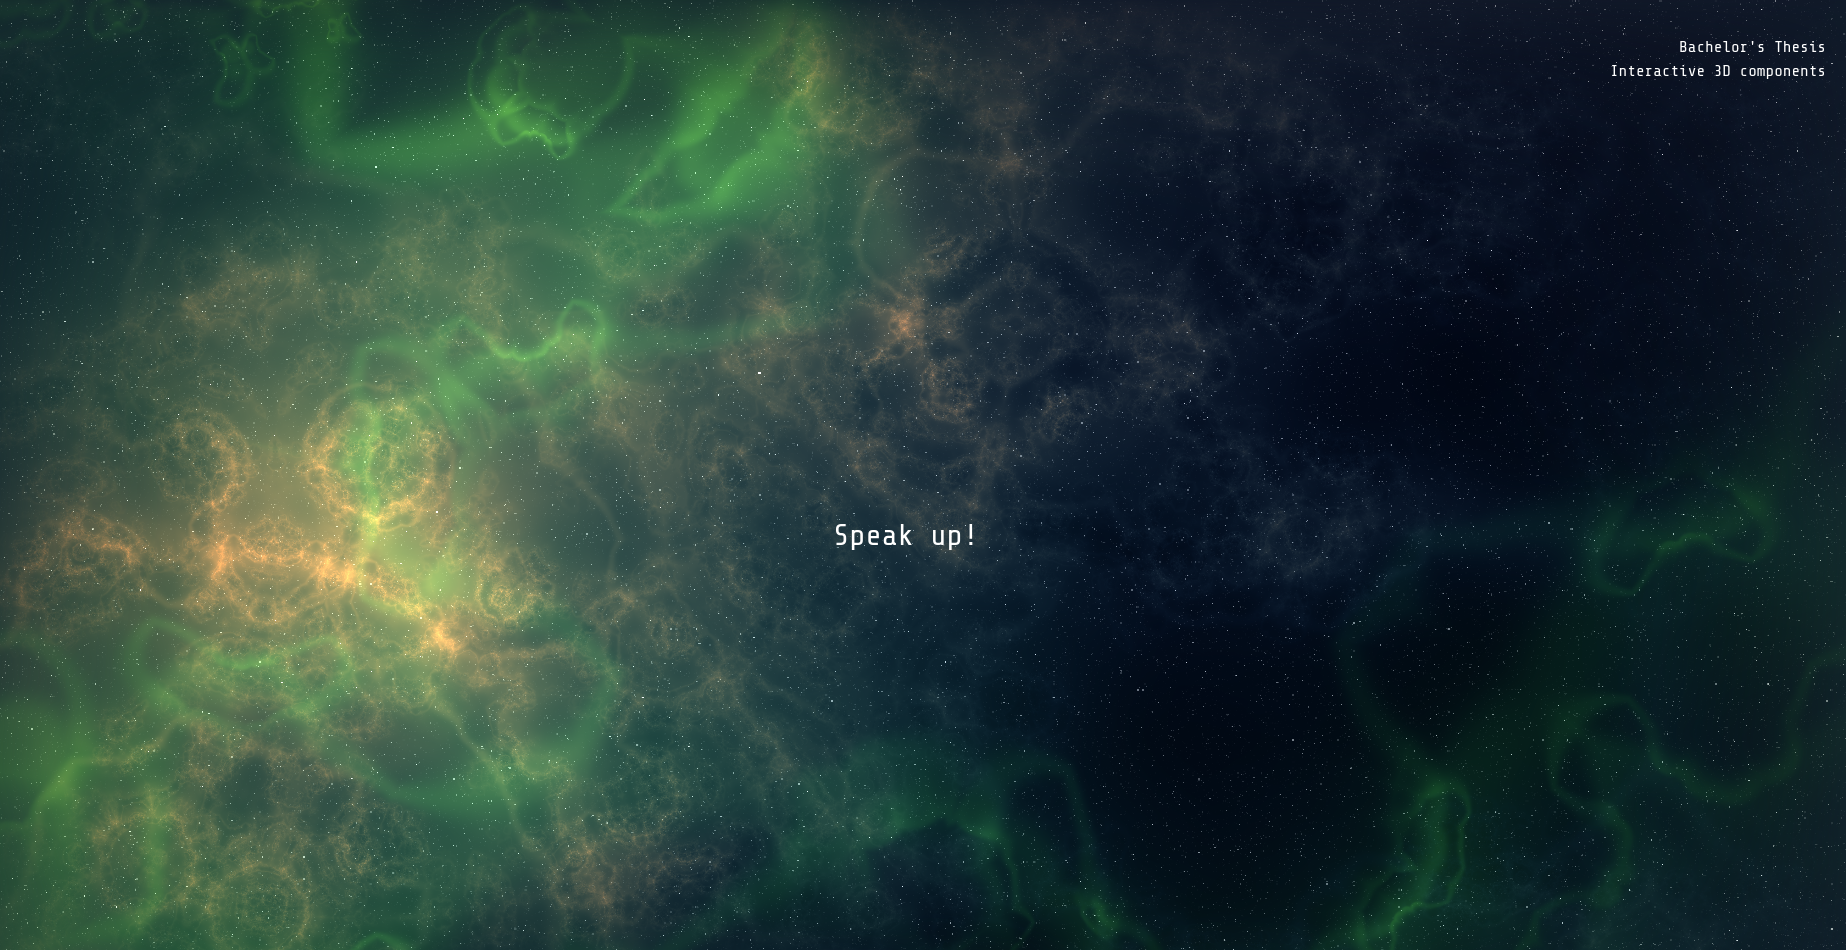
<p className="absolute inset-0 z-10 flex items-center justify-center text-3xl text-white">
Speak up!
</p>
<div className="fixed h-screen w-screen bg-gray-900">
<Canvas>
<Shader stream={stream} />
</Canvas>
</div>
</>
);
} else {
return <PermGranter setStream={setStream} />;
}
}8.4 The shader’s uniforms
Similar to other projects, it is necessary to feed the shader with their necessary uniforms, which are required for their rendering process. In this case, we only need three:
- The
iTime, which controls the internal clock of the shader - The
iResolution, which controls the size of the rendering canvas - The
iChannel0, which in this case, is aTHREE.DataTexturethat we will explain later
Let’s first implement the types by extending them from the THREE classes:
interface myMaterial extends THREE.Material {
  uniforms: {
    iTime: { value: number };
    iResolution: { value: THREE.Vector3 };
    iChannel0: { value: THREE.DataTexture };
  };
}

interface myMesh extends THREE.Mesh {
  material: myMaterial;
}
The
iVariableNamenaming convention comes from shadertoy, and it is being respected to communicate with the shader the same way.
8.5 Creating the shader’s material
Once we have a clear view of what the material needs, let us declare its initial state:
import frag from "../shader/fragment.glsl";
import vert from "../shader/vertex.glsl";
//...
const ShaderMaterial = shaderMaterial(
  {
    iTime: 0,
    iResolution: new THREE.Vector3( //ViewPort's resolution
      document.documentElement.clientWidth,
      document.documentElement.clientHeight
    ),
    iChannel0: 1, //Temporaray, we will pass in a real value later
  },
  vert,
  frag
);
When importing GLSL files, Typescript doesn’t know what to make of them. To tell TypeScript to import them as strings, you can create a declaration file
glsl.d.ts:
declare module "*.glsl" {
  const value: string;
  export default value;
}
8.6 How the audio affects the shader
The shader is tied to the microphone input through the uniforms, as it requires a THREE.DataTexture to pass in to the iChannel0 uniform. This is because the shader is composed of three layers:
- The base layers, which are the green galaxy that we see on the screen when we don’t talk
- The talking layer, which is what gets lighted up in blue when we do talk
- The filter. It only affects the talking layer, which isn’t a value from 0 to 1 as one would expect, but a material, which either can be completely black, or completely white (Or shades of gray in different areas!). If it’s black, the filter would not let any of the talking layer pass, and if it’s white, it would let it pass completely.
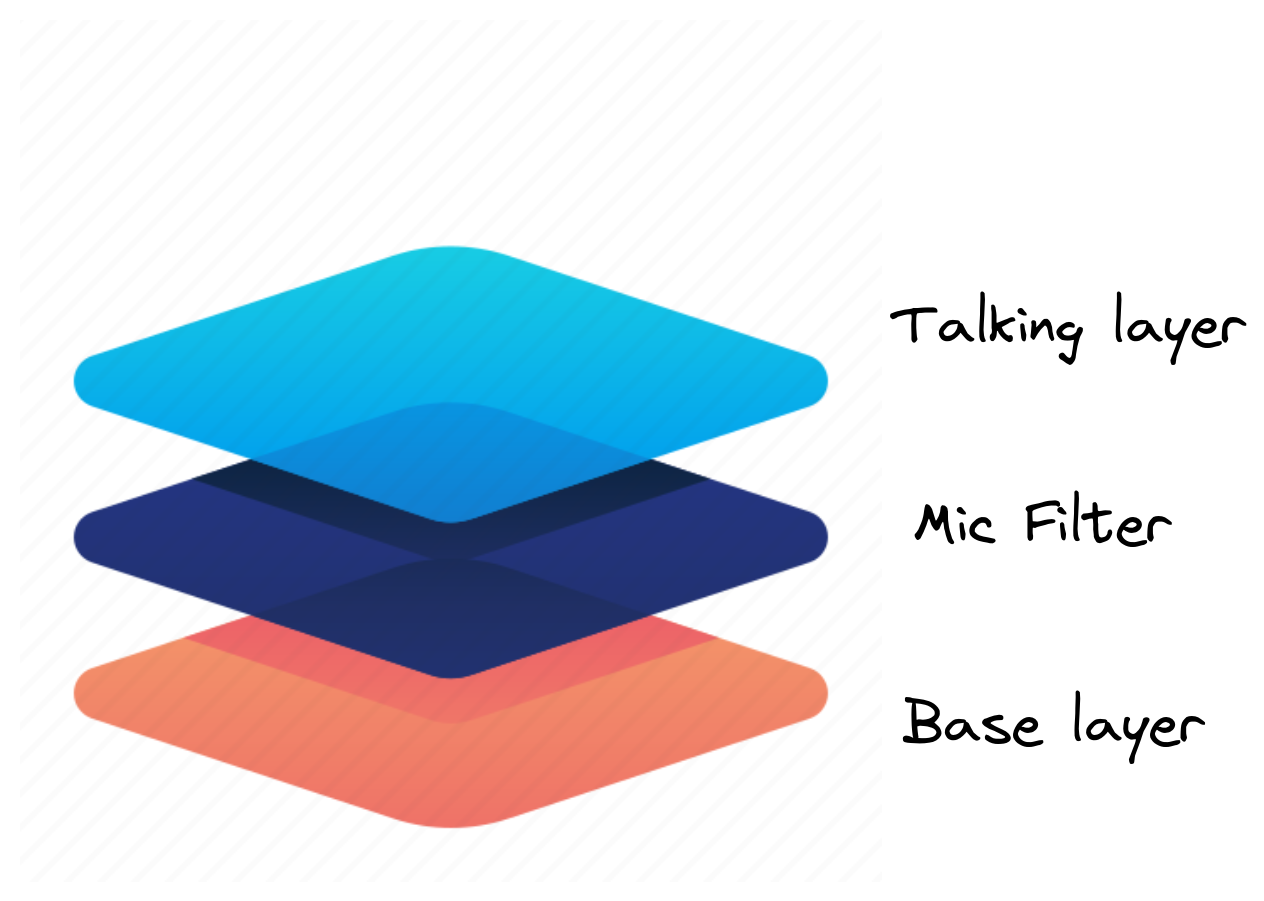
One may think of it as a camera filter. The darker the filter, the less you can see through.

8.7 Audio to Texture interpolation
To create a texture based on the material’s input, we need an Audio Context. This will be in preparation for extracting the Hertz frequency of the media stream. You may think of it as a DOM EventListener, we only connect the stream Media Source to an analyzer that can calculate the Heartz without modifying the input.
export default function Shader({ stream }: Props) {
  //Creates an analyser for the media stream
  const audioCtx = new AudioContext();
  const mic = audioCtx.createMediaStreamSource(stream);
  const analyser = audioCtx.createAnalyser();
  const FFTData = new Uint8Array(analyser.frequencyBinCount);
  analyser.fftSize = analyser.fftSize / Math.pow(2, 3); // default is 2048
  mic.connect(analyser);
  //...
}
Then, we make use of the custom R3F hook useFrame to update the uniforms in every frame. That is when the audio-to-texture interpolation occurs:
const ref = useRef<myMesh>(null!);

useFrame((state) => {
  //updates time and resolution uniforms
  ref.current.material.uniforms.iTime.value = state.clock.elapsedTime;
  ref.current.material.uniforms.iResolution.value = new THREE.Vector3(
    document.documentElement.clientWidth,
    document.documentElement.clientHeight
  );

  //Gets average mic hz
  analyser.getByteFrequencyData(FFTData);
  const avg = FFTData.reduce((prev, cur) => prev + cur / FFTData.length, 0);

  //Generates a gray scale image based on mic hz
  let amount = Math.pow(32, 2);
  let data = new Uint8Array(Math.pow(32, 2));
  for (let i = 0; i < amount; i++) {
    data[i] = avg * 20;
  }
  const audioTexture = new THREE.DataTexture(data, 12, 12);
  audioTexture.needsUpdate = true;

  //passes it as uniform
  ref.current.material.uniforms.iChannel0.value = audioTexture;
});
Lastly, to assure that the plane occupies the user’s viewport we create a simple plane that occupies the document client dimensions:
<>
  <Plane
    ref={ref}
    args={[
      document.documentElement.clientWidth,
      document.documentElement.clientHeight,
    ]}
  >
    <shaderMaterial key={ShaderMaterial.key} />
  </Plane>
</>