6. Buckle up
6.1 Installation
To set up the project, follow these installation steps:
git clone https://github.com/randreu28/TFG.buckle-up
cd TFG.buckle-up
yarn install
yarn dev
6.2 Overview
This project wouldn’t be possible without the help of dila, the creator of the shader on which this project relies.
This project was meant to explore shaders. To be more concrete, the R3F approach to using Shadertoy’s. Shadertoy is a library of shaders created by the community, and it offers a lot of different options with shaders.
As the era of WebGPU approaches, the community for shaders is too. If you’re interested in the next generation of shaders, you may refer to Compute Toys, a library made only for WebGPU shaders.
The main objective of this project was to find a way to integrate pure GLSL shaders into a React application and explore their potential for creating interesting visual effects.
Now, let’s examine the structure of the application:
<Suspense fallback={<Loading />}>
  <div className="...">
    <Canvas>
      <Shader />
    </Canvas>
  </div>
</Suspense>
6.3 Shader uniforms
In case you are not familiar with shaders, it is recommended that you’ve read the Particle showcase project, as it gives the base understanding
The <Shader/> component is a simple <Plane/> geometry that occupies the whole viewport, and the custom shader material.
<Plane
  ref={ref}
  args={[
    document.documentElement.clientWidth,
    document.documentElement.clientHeight,
  ]}
>
  <shaderMaterial key={ShaderMaterial.key} />
</Plane>
In this code snippet, the <Plane/> component is utilized with specific arguments to define its dimensions based on the client’s viewport size. Inside the <Plane/>, a <shaderMaterial/> component is added with a unique key to ensure proper updates and rendering of the custom shader material.
To ensure that the shader material receives the correct uniforms, we can define the appropriate types by extending the base types provided by R3F:
interface myMaterial extends THREE.Material {
  uniforms: {
    iTime: { value: number }; //Intenal time state of the shader
    iResolution: { value: THREE.Vector3 }; // Resolution of the shader (viewport dimensions)
    iChannel0: { value: THREE.Texture }; // Textures for the shader rendering
    iChannel1: { value: THREE.Texture };
    iChannel2: { value: THREE.Texture };
  };
}

interface myMesh extends THREE.Mesh {
  material: myMaterial;
}
In this code snippet, we define the myMaterial interface by extending the THREE.Material type. It includes uniforms as a property, which specifies the various uniform values required by the shader. The iTime uniform represents the internal time state of the shader, iResolution represents the resolution of the shader (viewport dimensions), and iChannel0, iChannel1, and iChannel2 represent the textures used for shader rendering.
Similarly, we define the myMesh interface by extending the THREE.Mesh type. It includes a material property of type myMaterial, ensuring that the custom shader material is correctly assigned to the mesh.
The
iVariableNamenaming convention comes from shadertoy, and it is being respected to communicate with the shader the same way.
Next, the iTime and iResolution need to be updated every frame, so we can use the useFrame custom hook from R3F:
useFrame((state) => {
  ref.current.material.uniforms.iTime.value = state.clock.elapsedTime * speed; //Speed multiplier from the leva controls
  ref.current.material.uniforms.iResolution.value = new THREE.Vector3(
    document.documentElement.clientWidth,
    document.documentElement.clientHeight
  );
});
6.4 Shader material
To declare the initial shader material, we import the fragment and vertex shaders from the respective files:
import fragment from "../shaders/fragment.glsl"; // From shaderToy
import vertex from "../shaders/vertex.glsl"; // From shaderToy
To import GLSL files as strings in TypeScript, you can create a declaration file named glsl.d.ts. In this file, you declare a module for *.glsl files and specify that they should be treated as strings:
declare module "*.glsl" {
  const value: string;
  export default value;
}
Next, in the Model component, we create the ShaderMaterial using the shaderMaterial function provided by react-three-fiber. We pass the necessary uniforms and shader sources to the function:
export default function Model() {
//...
const ShaderMaterial = shaderMaterial(
{
iTime: 0,
iResolution: new THREE.Vector3(
document.documentElement.clientWidth,
document.documentElement.clientHeight
),
iChannel0: textures[activeTextures.iChannel0], // From the leva controls
iChannel1: textures[activeTextures.iChannel1],
iChannel2: textures[activeTextures.iChannel2],
},
vertex,
fragment
);
//...
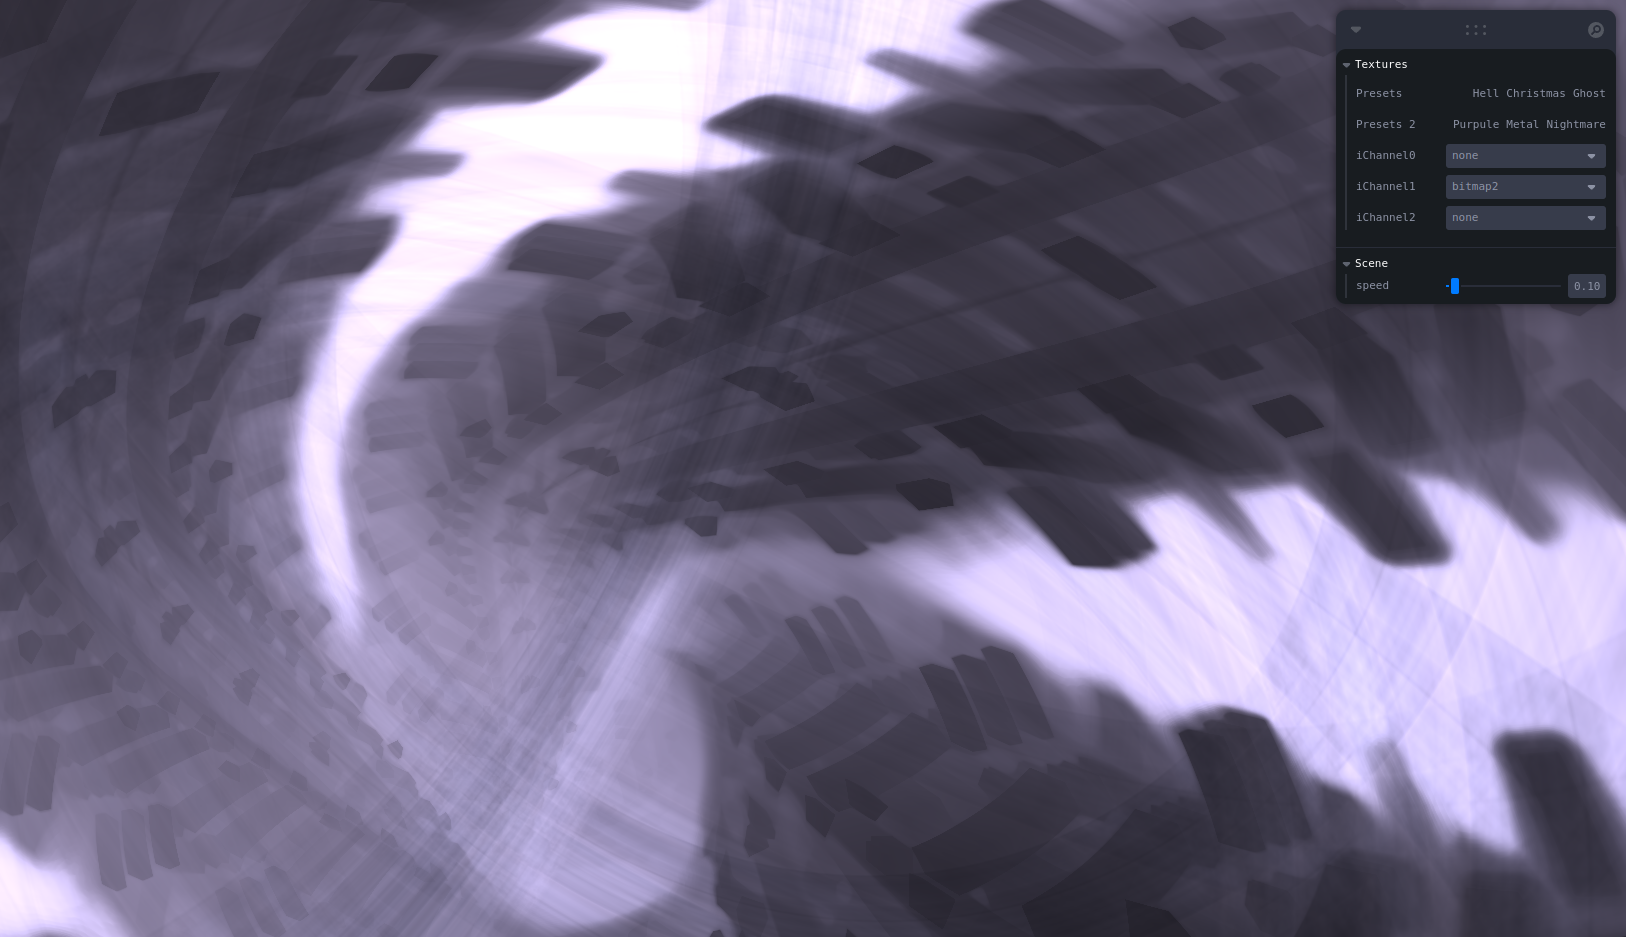
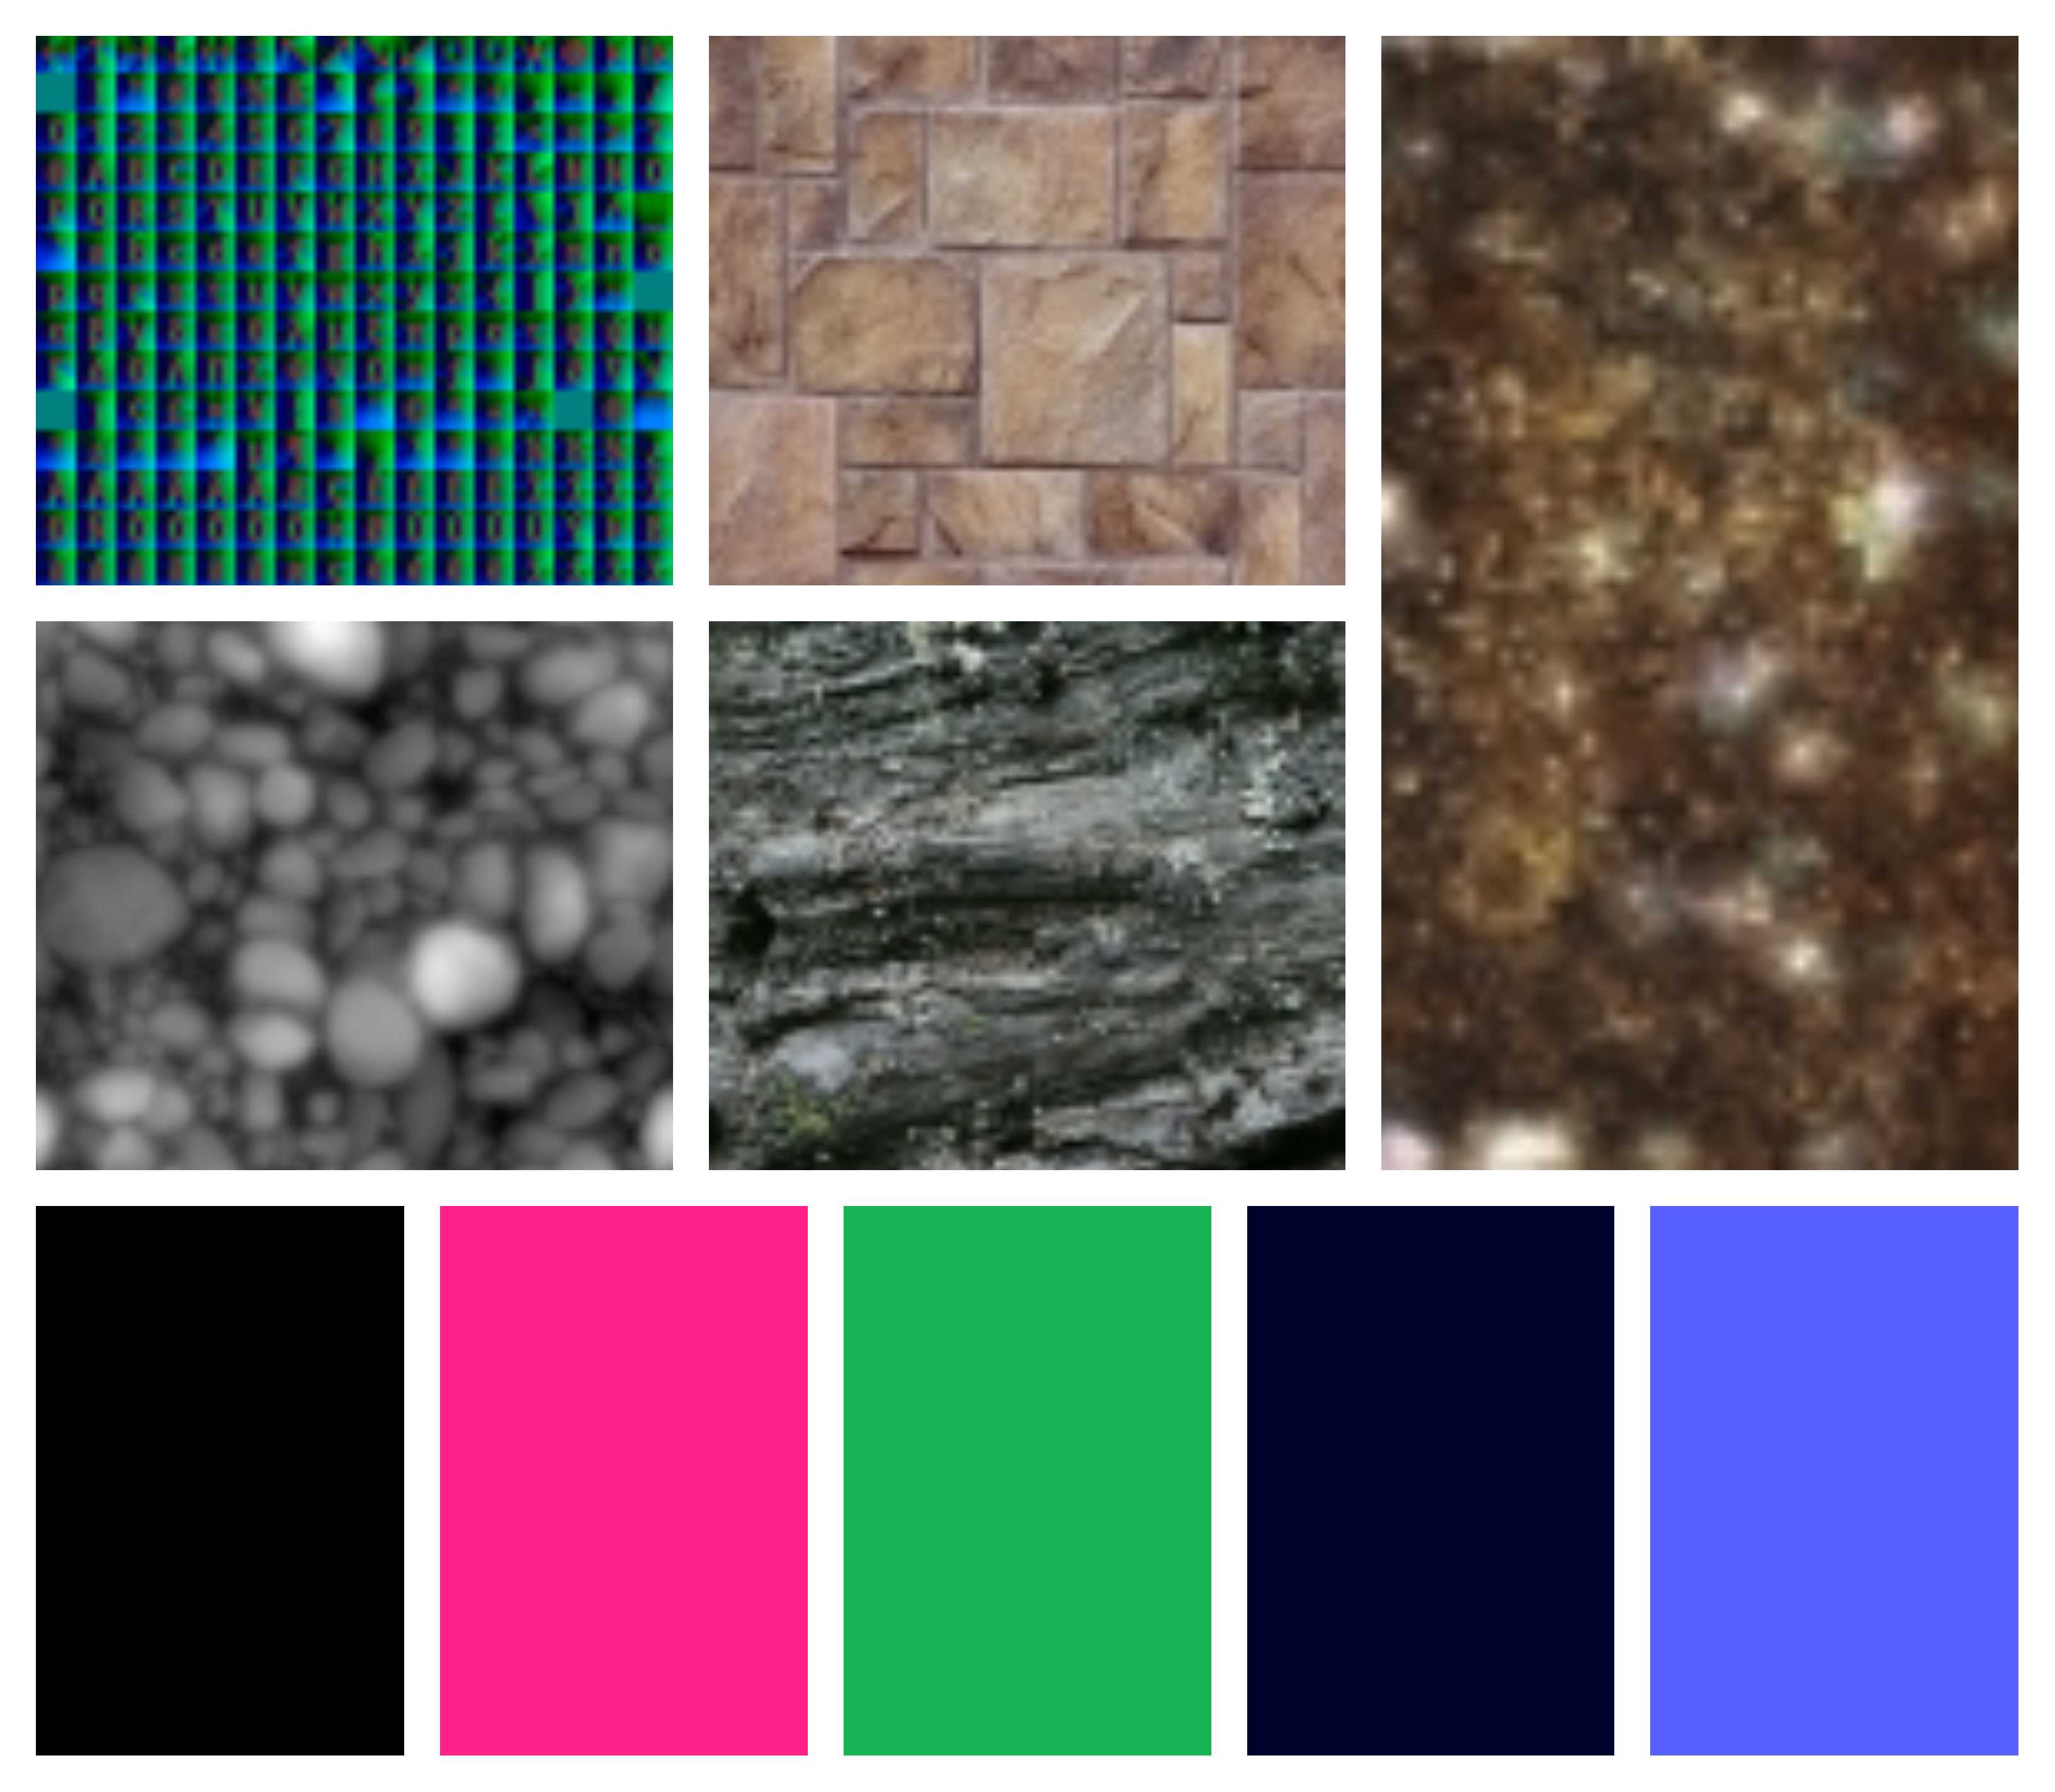
}Notice that the textures from the iChannels come from activeTextures. This comes from the leva controls, which are set up in such a way that they can choose from 10 different textures. The textures chosen provide a wide range of colors and combinations that allow the user to explore the different ways the shader relies on the materials:
6.5 Presets
The leva controls presets offer the user the possibility to interchange between the textures, but there are some presets that the user could select.
const [activeTextures, setActiveTextures] = useControls("Textures", () => ({
  iChannel0: {
    value: 0,
    options: textureControlOptions, //The list of materials
  },
  iChannel1: {
    value: 2,
    options: textureControlOptions,
  },
  iChannel2: {
    value: 0,
    options: textureControlOptions,
  },
}));
This already gives the user the ability to get all the combinations possible, but we’d like to create specific combination presets for the users to see:
const [activeTextures, setActiveTextures] = useControls("Textures", () => ({
  iChannel0: {
    value: 0,
    options: textureControlOptions,
  },
  iChannel1: {
    value: 2,
    options: textureControlOptions,
  },
  iChannel2: {
    value: 0,
    options: textureControlOptions,
  },

  1: buttonGroup({
    label: "Presets",
    opts: {
      Hell: () => {
        setActiveTextures({ iChannel0: 0, iChannel1: 6, iChannel2: 0 });
      },
      Christmas: () => {
        setActiveTextures({ iChannel0: 6, iChannel1: 1, iChannel2: 0 });
      },
      Ghost: () => {
        setActiveTextures({ iChannel0: 0, iChannel1: 2, iChannel2: 0 });
      },
    },
  }),

  2: buttonGroup({
    label: "Presets 2",
    opts: {
      Purpule: () => {
        setActiveTextures({ iChannel0: 7, iChannel1: 10, iChannel2: 5 });
      },
      Metal: () => {
        setActiveTextures({ iChannel0: 0, iChannel1: 4, iChannel2: 9 });
      },
      Nightmare: () => {
        setActiveTextures({ iChannel0: 0, iChannel1: 0, iChannel2: 4 });
      },
    },
  }),
}));
This way, the user can have a set of predefined texture combinations easily with the click of a button.