9. Halo inspector
9.1 Installation
To set up the project, follow these installation steps:
git clone https://github.com/randreu28/TFG.halo-inspector
cd TFG.halo-inspector
yarn install
yarn dev
9.2 Overview
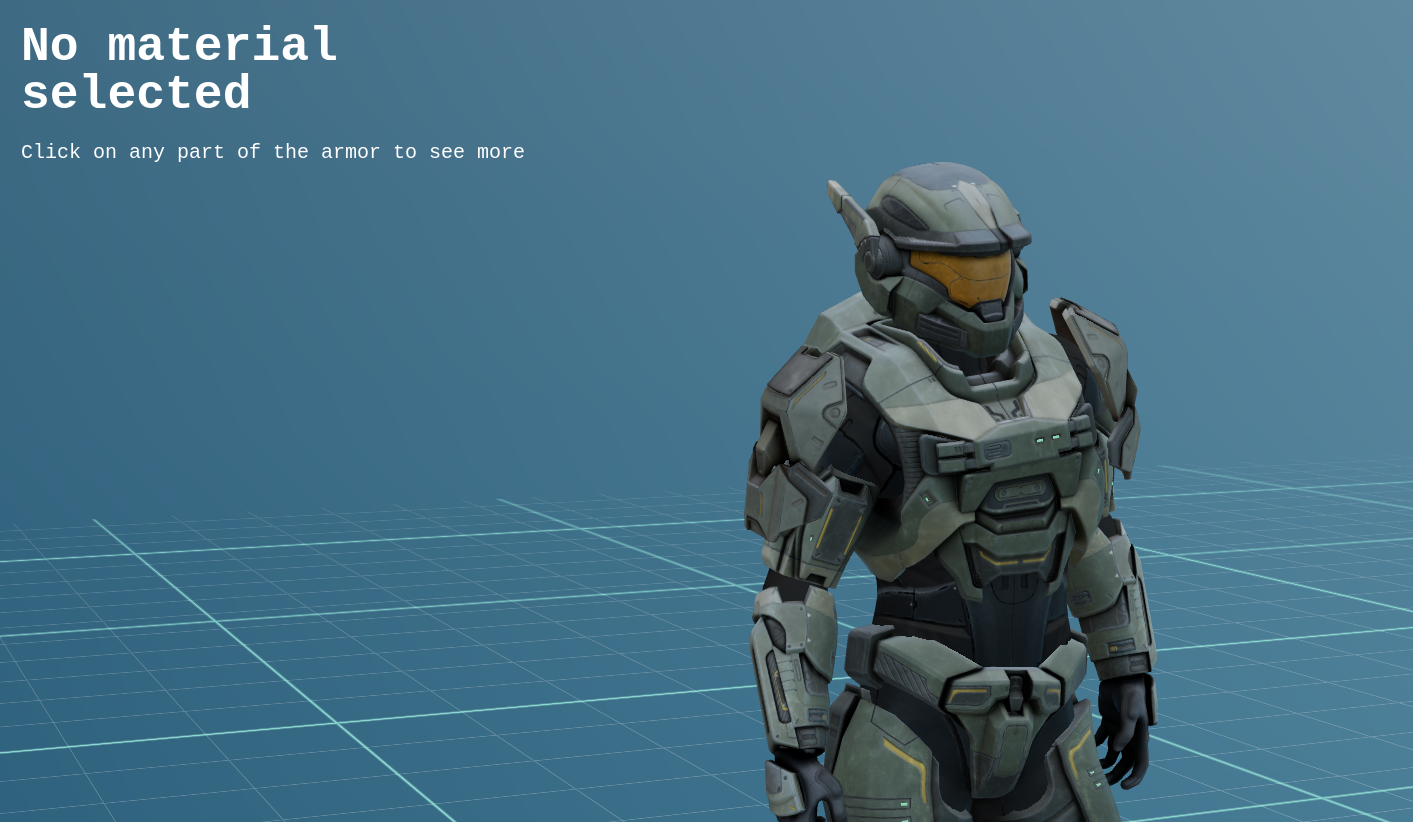
This project was designed to be an inspector of a given object, in this case, a halo model. The idea is to have each piece of the model be clickable and inspectable, with a complementary text to accompany it.
The project couldn’t have been possible without the aid of, McCarthy3D the creator of the 3D model.
Now, let’s examine the structure of the application. Note that we are using Jotai as state management, as well as @a7sc11u/scramble
import { TextScramble } from "@a7sc11u/scramble";
import { useAtomValue } from "jotai";
import { Suspense } from "react";
import Loading from "./components/Loading";
import Scene from "./components/Scene";
import Signature from "./components/Signature";
import { matAtom } from "./lib/store";
import { getInfo } from "./lib/utils";

export default function App() {
  const material = useAtomValue(matAtom); // Gettting the selected material
  const info = getInfo(material); // Computing the complementary text based of the material

  return (
    <div className="h-screen w-screen flex justify-center items-center">
      <Suspense fallback={<Loading />}>
        <div className="absolute left-10 top-10 z-10 max-w-xl space-y-5">
          <TextScramble
            className="text-5xl font-bold"
            as="h2"
            speed={1}
            text={info.title}
          />
          <TextScramble
            className=" text-xl"
            as="p"
            speed={5}
            text={info.description}
          />
        </div>
        <Scene /> {/* Where the magic happens  */}
      </Suspense>
    </div>
9.3 The model
The model .glb file was first imported as a React component using the gltf-to-jsx CLI. As discussed in detail in the TriArt project. The generated result gives us a type-safe JSX through the useGLTF hook from R3F. Here’s the generated result:
/*
Auto-generated by: https://github.com/pmndrs/gltfjsx
author: McCarthy3D (https://sketchfab.com/joshuawatt811)
license: CC-BY-4.0 (http://creativecommons.org/licenses/by/4.0/)
source: https://sketchfab.com/3d-models/spartan-armour-mkv-halo-reach-57070b2fd9ff472c8988e76d8c5cbe66
title: Spartan Armour MKV - Halo Reach
*/

import * as THREE from "three";
import { useEffect, useRef } from "react";
import { useGLTF, useAnimations } from "@react-three/drei";
import { GLTF } from "three-stdlib";

export function Model(props: JSX.IntrinsicElements["group"]) {
  const group = useRef<THREE.Group>(null!);
  const { nodes, materials, animations } = useGLTF("/halo.glb") as GLTFResult; // Also generated by gltf-to-jsx CLI!
  const { actions } = useAnimations<Animations>(animations as any, group);

  return (
    <group ref={group} {...props} dispose={null}>
      <group name="Sketchfab_Scene">
        <group
          name="Sketchfab_model"
          rotation={[-Math.PI / 2, 0, 0]}
          scale={0.02}
        >
          <group
            name="4757fffebe2a4d47b38143266af5f1a9fbx"
            rotation={[Math.PI / 2, 0, 0]}
          >
            <group name="Object_2">
              <group name="RootNode">
                <group name="Floor">
                  <mesh
                    name="Floor_lambert2_0"
                    castShadow
                    receiveShadow
                    geometry={nodes.Floor_lambert2_0.geometry}
                    material={materials.lambert2}
                  />
                </group>
                <group name="group">
                  <group name="Object_7">
                    <primitive object={nodes._rootJoint} />
                    <group name="Object_9" />
                    <group name="Object_11" />
                    <group name="Object_19" />
                    <group name="polySurface436" />
                    <group name="Helmet" />
                    <group name="Armour" />
                    <group name="Armour_LP" />
                    <skinnedMesh
                      name="Object_18"
                      geometry={nodes.Object_18.geometry}
                      material={materials.lambert1}
                      skeleton={nodes.Object_18.skeleton}
                    />
                    <skinnedMesh
                      name="Object_10"
                      geometry={nodes.Object_10.geometry}
                      material={materials.Spartan_Ear_Mat}
                      skeleton={nodes.Object_10.skeleton}
                    />
                    <skinnedMesh
                      name="Object_13"
                      geometry={nodes.Object_13.geometry}
                      material={materials.Spartan_Ear_Mat}
                      skeleton={nodes.Object_13.skeleton}
                    />
                    <skinnedMesh
                      name="Object_17"
                      geometry={nodes.Object_17.geometry}
                      material={materials.Spartan_Shoulders_Mat}
                      skeleton={nodes.Object_17.skeleton}
                    />
                    <skinnedMesh
                      name="Object_12"
                      geometry={nodes.Object_12.geometry}
                      material={materials.Spartan_Helmet_Mat}
                      skeleton={nodes.Object_12.skeleton}
                    />
                    <skinnedMesh
                      name="Object_16"
                      geometry={nodes.Object_16.geometry}
                      material={materials.Spartan_Legs_Mat}
                      skeleton={nodes.Object_16.skeleton}
                    />
                    <skinnedMesh
                      name="Object_20"
                      geometry={nodes.Object_20.geometry}
                      material={materials.Spartan_Undersuit_Mat}
                      skeleton={nodes.Object_20.skeleton}
                    />
                    <skinnedMesh
                      name="Object_15"
                      geometry={nodes.Object_15.geometry}
                      material={materials.Spartan_Arms_Mat}
                      skeleton={nodes.Object_15.skeleton}
                    />
                    <skinnedMesh
                      name="Object_14"
                      geometry={nodes.Object_14.geometry}
                      material={materials.Spartan_Chest_Mat}
                      skeleton={nodes.Object_14.skeleton}
                    />
                  </group>
                </group>
              </group>
            </group>
          </group>
        </group>
      </group>
    </group>
  );
}

useGLTF.preload("/halo.glb");
Although the output of the shader material might be verbose, it provides granular control over each mesh, which is essential for the required tasks. Additionally, by using a useEffect hook, we can initialize the breathing animation of the model on the initial load, and thanks to TypeScript, we have full type safety when accessing it.
useEffect(() => {
  actions["Take 001"]?.play();
}, []);
9.4 Material selection
For the material selection, we relied on the React-Spring library, an animation library similar to gsap, but with a modern react-based approach. The animations (besides the camera movements) are on the material’s opacity, as they get more opaque or less depending on whether they are selected or not.
The React-Spring library was made by the pnmdrs collective, the same collective that created R3F, among many other libraries that we have used for this thesis. The synergy with our tools is so much so that React-Spring even has a chapter in its documentation dedicated to R3F integrations.
As we need to control multiple materials simultaneously, we utilized the useSprings custom hook from React-Spring. This hook enabled us to create seamless opacity interpolations with a user-friendly API.
/* Makes the materials transparent, so we can play with its opacity later */
for (let _mat in materials) {
  let mat = materials[_mat as keyof typeof materials];
  mat.transparent = true;
}

/* Creates a state using springs to interpolate the opacities */
const [opacities, opacitiesOptions] = useSprings(
  Object.keys(materials).length,
  () => ({
    opacity: 1,
  })
);

/* Links the spring state to the material's value each frame */
useFrame(() => {
  let i = 0;
  for (let _key in materials) {
    const key = _key as NonNullable<MatName>;
    materials[key].opacity = opacities[i].opacity.get();
    ++i;
  }
});
Once we have set up the useSprings hook, we can proceed to create the onClick function handler.
/**
 * Reduces the opacity of every material except the one clicked
 */
function handleClick(e: ThreeEvent<MouseEvent>) {
  e.stopPropagation();
  let matName: MatName; // An array of strings representing all the possible material names

  if (e.object instanceof THREE.Mesh) {
    matName = e.object.material.name;
  } else {
    console.error("You didn't click on a Mesh");
    return;
  }

  const arrayMats = Object.values(materials);

  opacitiesOptions.update((i) => ({
    opacity: matName === arrayMats[i].name ? 1 : 0.1,
  }));
  opacitiesOptions.start();
  setMat(matName); //Saves it on Jotai, our state management library
}
In addition to the onClick function handler for zooming in, we can create another function to handle the zoom out functionality when the user clicks on any other part of the screen.
function handlePointerMissed() {
  opacitiesOptions.update(() => ({
    opacity: 1,
  }));
  opacitiesOptions.start();

  setMat(undefined);
}
And we simply attach it to the parent group:
<group
  onClick={handleClick}
  onPointerMissed={handlePointerMissed}
  ref={group}
  {...props}
  dispose={null}
>
  {/* .... */}
</group>
9.5 Camera movements
Every time a material is selected, there is an interpolation of the camera’s position (a Vector3, in Three.js lingo), and a position of the material in close-up. For that, it was implemented a <CustomCamera/> component that handles all of these interpolations.
Before going into the <CustomCamera/> component, there is a small detail we might want to add to the model, to appropriately reference the meshes later. On each skinned mesh, it is pertinent to set the name attribute to the material’s name, like so:
<skinnedMesh
  name={materials.lambert1.name}
  geometry={nodes.Object_18.geometry}
  material={materials.lambert1}
  skeleton={nodes.Object_18.skeleton}
/>
This will allow us to find each particular mesh by its name on the <CustomCamera/> component:
import { CameraControls } from "@react-three/drei";
import { useThree } from "@react-three/fiber";
import { useAtomValue } from "jotai";
import { useRef } from "react";
import { matAtom } from "../lib/store";

export default function CustomCamera() {
  const ref = useRef<CameraControls>(null!);
  const material = useAtomValue(matAtom); //From our store

  //Let's us get any value of the raw THREE.scene
  const get = useThree((state) => state.get);

  if (!material) {
    // When the user click's anywhere but the model
    ref.current?.setLookAt(3, 2, 6, 0, -0.5, 0, true);
    return <CameraControls ref={ref} distance={5} />;
  }

  //We're able to do this due to the previous step
  const selectedNode = get().scene.getObjectByName(material);

  if (!selectedNode) {
    //On loading stages there isn't any node and it returns undefined
    return <CameraControls ref={ref} distance={5} />;
  }

  ref.current?.fitToBox(selectedNode, true); // The native THREE.js way to interpolate a Vector3

  return <CameraControls ref={ref} distance={5} />;
}
Fortunately, R3F has a wide range of controllers for the camera. This time we’re using the R3F adaptation of the camera controls library, which can be interpreted as an inhereted extension of the more common <OrbitControls/>, with the addition of extra features, such as methods for tridimensional interpolations:
At first, it was considered interpolating using the setPosition method, which already out of the box supports a smooth camera transition, but had the inconvenience of finding the specific Vector3 for each material by hand. This approach assumed that the object may never move from it’s original postion, and it was not the most elegant of the approaches.
Luckily, the camera controls library also comes with the fitToBox method, which creates a bounding box around the specified object and makes it so that the camera zoom’s in into said bounding box with a specified padding from the viewport’s dimension.

This allows us to delegate the finding of the appropriate framing of the selected object, no matter from which starting position the camera finds itself, or if the object is moving or has moved since we first declared the Vector3 for each material.
